It’s that time of year when the evenings are drawing in and the boating season is winding down. A time when you should be thinking about the proper measures to take to protect your cherished craft from a period of extended inactivity. Any period of inactivity will lead to wear and tear on a boat as corrosion spreads and moisture gets into the places it really shouldn’t. Left unattended lubrication can congeal and any problems left unresolved will come back and bite you when the sailing seasons begins once again. In this guide we’ll look at a few simple measures you can take to ensure that your boat is in tip-top condition for springtime’s open seas.
The first thing to do is to draw up a checklist of the tasks needed for the winterisation process. Consult your owner’s manual and if it’s your first time, enlist the help of an experienced friend. If in any doubt, always consult a professional.
Storage
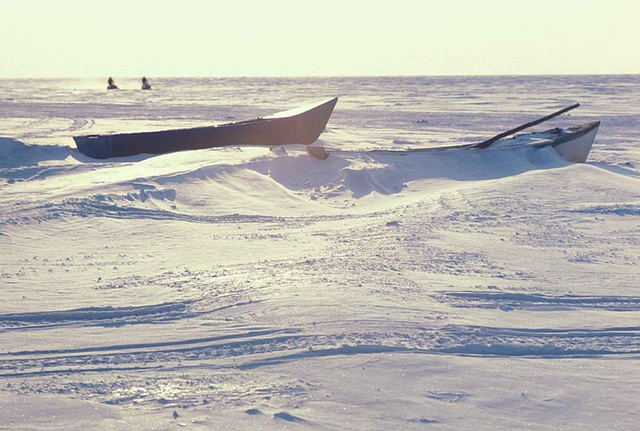
The first thing to consider is where you are going to store your boat during the off-season. Is it practical and within your budget to store the craft out of the water? This is by far the best protective measure you can take; however, it may prove to be expensive for a larger boat to be taken out of the water and stored in a climate-controlled boat house. Shrink-wrapping is an option, but this is also an expensive operation especially on a larger vessel. At the very least, ensure your boat is covered with a tarp or some other sturdy weatherproof cover. Keeping a boat out of the water will reduce the likelihood of damage resulting from storms, theft or sinking whilst keeping a boat in the water can mean it will suffer less from a big freeze as water retains heat longer than air. If you plan on dry docking your boat, it is wise to start preparing the winterising process earlier than you would for a boat being left in the water. More info on Storing Your Boat here!
In Water Storage
Firstly, close all seacocks and check the rudder shafts and stuffing boxes for leaks. Ensure your bilge pumps are working and that float switches properly activate the pumps. Check carefully for any debris and remove as necessary. Make sure your battery is fully charged and clean the terminals and add distilled water to the cells if needed. If your mooring area is likely to freeze over, then ensure you have water agitators suspended to bring warmer water to the surface so the craft is not iced in.
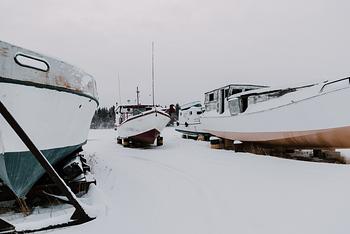
Out of Water Storage
Clean all thru-hulls and strainers and open seacocks and allow to fully drain. Clean the hull with a pressure washer (GRP and fibreglass boats only. Never use a pressure washer on a teak boat) and check for damage such as blisters and treat accordingly. Ensure the batteries are fully charged and all switches are turned off. Park your boat under a protective canopy if possible and avoid locations with falling leaves, direct sunlight and minimise exposure to wind. Keep any covers free of debris such as snow and water and tighten everything down. Make sure the boat is angled bow upwards to enable rainwater to drain off the covers, deck and cockpit.
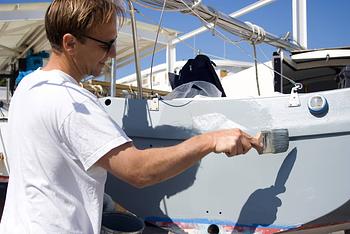
A Clean Boat is a Happy Boat
It may sound obvious but the first thing to do is to thoroughly clean your boat. A clean boat will reduce the amount of work when the time comes to set sail again. Start by giving the deck, underside and topsides a thorough wash with warm water. Use a steam cleaner on stubborn stains and marks and use a little wax which will help to extend the life of the boats materials. Use a shammy leather to wipe down the excess water and use a suitable product on any hardware. On GRP or fibreglass boats, check for any blistering and treat and repair if required. Check mouldings for any impact damage such as stress cracks, scratches and chips. Clean any residue salt from canvas spray hoods and windscreens and allow to dry before neatly storing them away. If it’s possible, remove all the canvas from your boat and store indoors to extend their life. Remove any masthead instruments and lights, aerials and wind indicators and check for any damage and store them inside. To avoid mould, remove any soft furnishings and take them home to store in the dry. Remove any perishables and clean out any fridges, freezers and other galley items. Prop open the fridge/freezer and cupboard doors to prevent mould and ensure adequate ventilation throughout. Ensure the boat is as dry as possible before using a suitable cover to protect from rain, cold, snow and ice. Items such as flares, fire extinguishers, fenders and electronics should also be dry stored whenever is possible. Check for any expiry dates on perishable items such as flares and fire extinguishers and replace if necessary. GPS/chart plotters, radar displays, VHF radios and other electronics should be removed for safety and security and any loose cable ends/connectors should be wrapped with electrical tape. Turn off your gas bottle and burn off any gas left in the pipes. The head is an area which is obviously cleaned frequently but for winterising there are a couple of extra measures to be taken. Pump out the system and add fresh water and flush several times to clean the entire system. Add any antifreeze but also check your owner’s manual to ensure that this will not cause any damage to the system first. Completely drain the fresh water tank and hot water heater and then isolate the hot water heater by disconnecting the in and out lines and connect them together. Run a non-toxic antifreeze through the system including the water heater. Turn on all the faucets including shower and wash-down areas until you see antifreeze coming out. Lightly apply a moisture displacing lubricant to the many moving metal parts onboard such as hinges, latches, switches, linkages, ratchet mounts, bow rollers and suchlike. Check the boat from bow to stern visually for any problem areas. Pay particular attention to cables and wiring for damage and/or wear and tear. Look for signs of corrosion and damaged insulation on fuses and wiring connections. Inspect hoses and fuel lines for leakages and pay particular attention to hose clamps for corrosion and tightness.

Inboard Engines and Stern Drives
Run the engine to warm it up and change the oil while it is still warm to ensure the oil drains fully. Remove the oil filter and replace. Ensure you supply cooling water to the engine via the flushing port. Check the oil level and look for any signs of leaks. Thoroughly flush the engine with fresh water to remove any salt, dirt and corrosion and run antifreeze into the cooling system as per the manufacturer’s specifications. To avoid condensation, top off your fuel tank and change the fuel filter. It is also advisable to add a marine fuel stabiliser to help reduce the build-up of gum and varnish and ensure both fuel and the entire system is clean during storage. Run the engine for a few minutes to make sure it circulates through the entire system. Check the fuel filler cap and lightly smear Vaseline around the thread to give a better seal to stop any rain water entering the tank. This also makes it easier to open in the spring. Drive belts should be loosened as they may crack under tension during a period of extended storage. Consult your engine manufacturer’s guide and spray the appropriate fogging oil either through the spark plug holes or directly into the carburettor whilst the engine is turning over. This will ensure that the engine’s internal parts are as lubricated as possible. Apply water resistant grease to the propeller shafts and threads and lightly lubricate the exterior of the engine or polish with a good quality wax. Finally wash the engine down with soap and warm water and then rinse thoroughly. Inspect the stern drive and remove any marine life such as barnacles from the lower unit. Drain the gear case whilst checking for any moisture in the system which could be an indication of a leaky seal. Wash the lower unit with soap and warm water. Also check for any cracks or pinholes in the rubber boot between the transom and the engine. Grease any fittings and check hydraulic levels in the steering or lift pumps. Apply marine grease to the fittings on the sterndrive gimbal bearing and engine coupler including those on the steering tilt tube and engine trim mechanism. Remove the SW pump impeller and tie it to the side of the pump. This prevents it from becoming deformed and less effective or liable to failure. It is however, wise to change the impeller once a year. It is also a good idea to block off the exhaust and the air inlet with tape, an oily rag or a rubber bung to prevent any moisture entering the engine. Remove the propeller and inspect for wear or damage. Coat the propeller shaft with a high-quality water resistant grease before replacing the propeller.
Outboard Engines
Treat any fuel in the tank with the correct amount of fuel stabiliser. Using flush muffs or the flushing port (usually on the back of the engine), flush the engine with fresh water. remove the cowl and run the engine whilst spraying a fogging solution into the air intakes on the front of the engine. Whilst it is still running, remove the fuel lines and continue spraying until the engine dies. This ensures all the fuel in the carburettor is burnt up thus preventing the build-up of deposits from evaporated fuel. Change the gear oil in the lower unit before lightly lubricating the exterior of the engine or polishing with a good quality wax. Finally wash the engine down with soap and warm water before rinsing off thoroughly.

Battery
Boat batteries don’t come cheap so to prolong their life, disconnect once you’ve completed the winterising process on the engine. Fully charge up and top up the cells with distilled water before storage. Clean the battery cable ends and place a light coat of lithium grease on the cables and battery terminals.
Bilges
Check the bilges and remove any standing water and clean up any oil or dirt with hot water and soap using a stiff brush. Once cleaned, spray with a moisture displacing lubricant before adding a little antifreeze to prevent any water freezing. Do the same with any livewells, lockers, fish holds and storage areas. Mould and mildew are your enemy so place moisture absorbers in them to eliminate their growth.
Masts, Sails and Rigging
Sails can rapidly turn green if they are left outside in the damp. Closely examine the sails for damage to the stitching and any nicks, chafes or tears, paying particular attention to high load zones such as areas around the clew, tack and head. Also examine the leech, batten pockets and spreader patches. It’s not the best idea to store your sails onboard so find somewhere dry, secure and safe to do so. Some sailmakers offer a winter sails, clean, repair and storage service which is often wise to consider. Halyards, sheets and lines become caked in dirt and salt and should be removed and washed thoroughly in fresh water. Examine them carefully for any damage and chaffing and replace as needed. Fully checking the rigging is advisable paying particular attention to areas around fittings such as swages, spreader roots and rigging terminals. Check spreader ends are smooth. Ensure the halyard sheaves run smoothly and lubricate with a good quality silicon spray. If you are happy and confident with heights check your mast for any damage or wear and tear. Remove any masthead instruments. Don’t leave any ropes lying on a wet deck as they will quickly turn green. Mouse them out of your mast using a strong mousing line marking the halyards so you remember where to refit them when the time comes. This will prevent chaffing during the winter months and presents an opportunity to closely inspect them for any damage. Wash them out to remove all the salt that has built up over the sailing season.

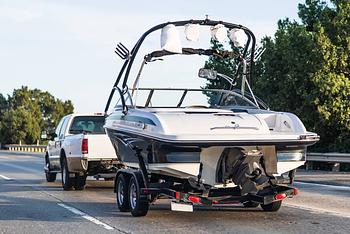
Trailers
Carefully inspect and repair any damage to your trailer paying particular attention to the bearings, tyres, lights, winch or coupling. Lubricate everything well to ensure it is protected from the elements. Treat any rust patches and paint over. Ideally it is wise to have your trailer serviced annually and it should be washed down with fresh water every time you use it. For added security consider removing the wheels. This also extends the life of the tires, axle and suspension springs.
Check Your Boat Regularly
All of the above factors are great to do before your boat goes into storage, however, it is wise to regularly check your boat during the winter months. This will raise awareness of any potential problems and ensure you can remedy then before the sailing season begins.
Always check your manufacturer’s manual before attempting any maintenance. If in doubt always seek the help of a professional who can advise or carry out the winterisation for you.

Related Articles and Guides
29th Mar 2024
How to Transport Your Boat Four Different Ways
18th Oct 2023
How to Winterize a Boat: Steps, Checklist and Costs
20th Sep 2023
Painting a Fiberglass Boat: A Detailed Guide
19th Sep 2023


